3D Printing (๑˘ᵕ˘)
- jiamin20
- Dec 31, 2021
- 3 min read
It's 3D printing time! 🤓 What is 3D printing? In the tutorial lesson, we learnt that there are 3 steps in 3D printing: 3D design in Fusion 360, Convert 3D design to STL and Cura slicer. All these steps must be accomplished before we can use the 3D printer to print out our design.
To start off 3D printing, I will have to first 3D design using Fusion 360. I decided to do a hinged box and here is how I designed my hinged box using Fusion 360!
Step 1: Create new component named Bottom Box.

Step 2: Create a 2-point rectangle with the dimension of 70x70

Step 3: Change parameters
Wall Thickness 1.3 mm, Box Height 70mm, Gap 0.50 mm

Step 4: Extrude the sketch to Box Height
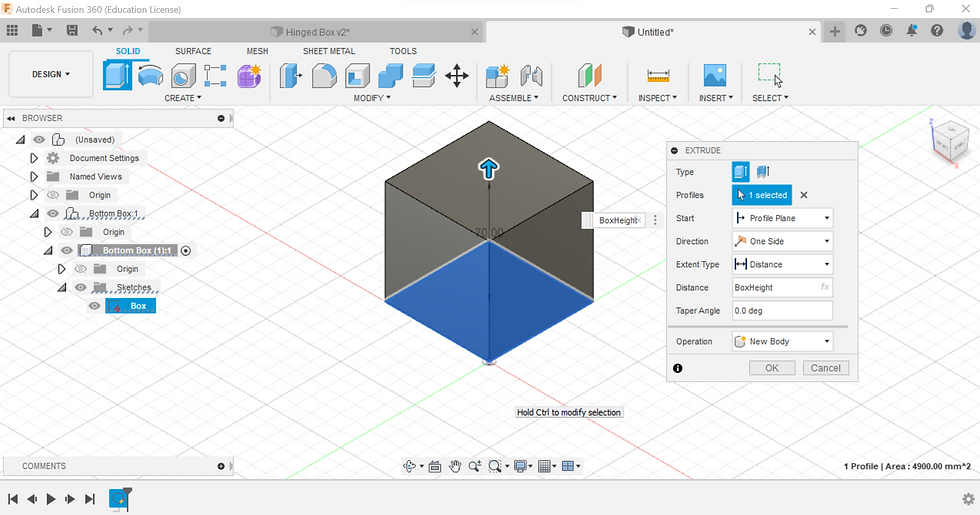
Step 5: Create a hollow interior of Wall Thickness by using the Shell function
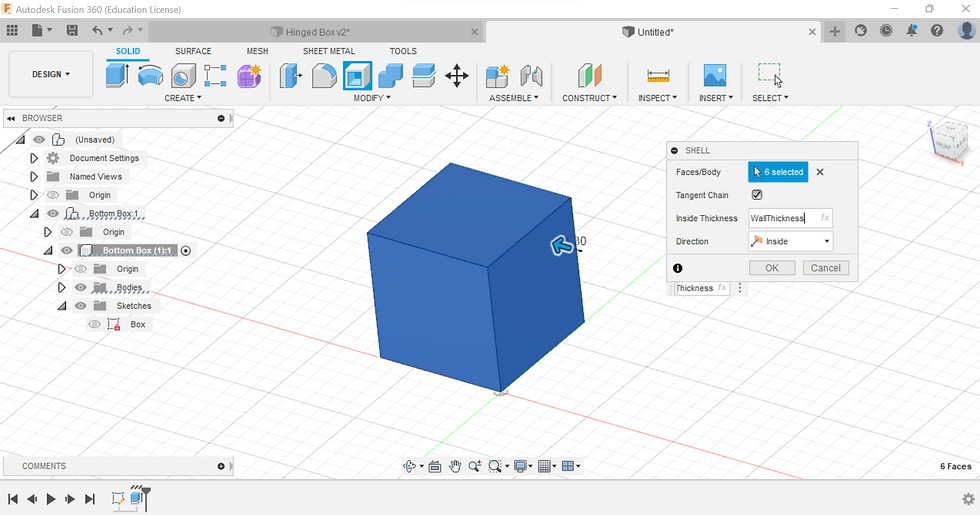
To check whether the shell has been created, I used section analysis to look into the Box.
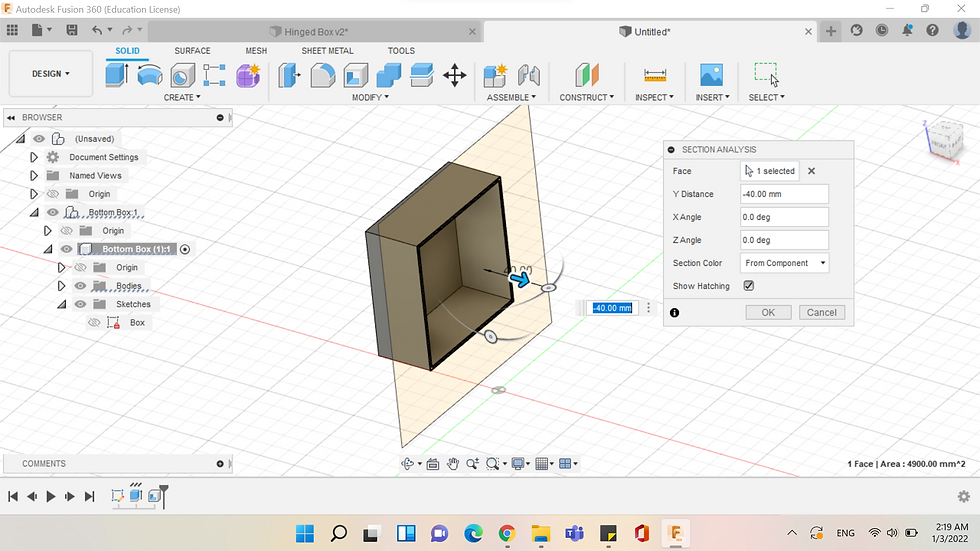
Step 6: Offset -BoxHeight/2

Step 7: Split Body

Step 8: Create sketch on the Bottom Body

Step 9: Create a line of 2.95 mm from the center of the box and create 3 circles and change the dimension of the circles: Innermost circle (Wall thickness), 1st to 2nd circle (Gap), 2nd to 3rd (Wall Thickness).

Step 10: Create 2x 45 degree line from the outermost edge of the circle.
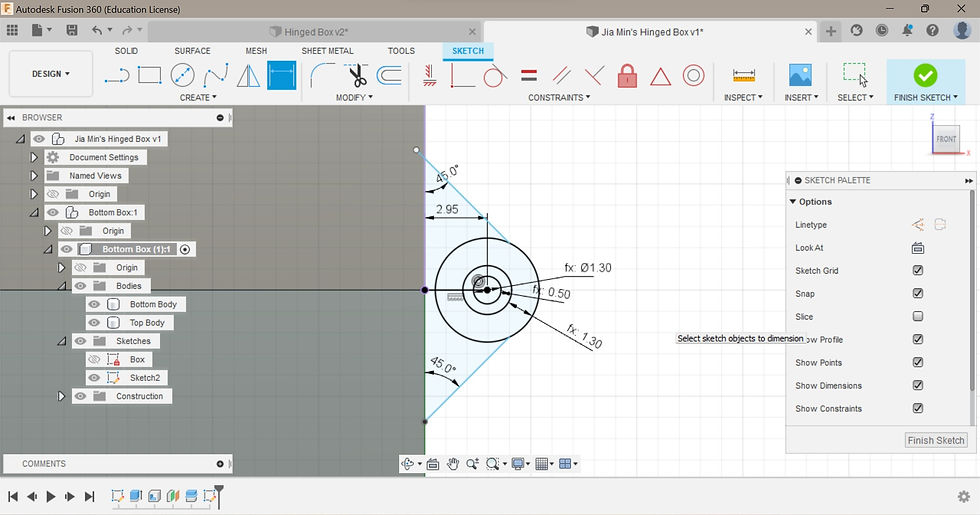
Step 11: Create bottom hinge, top hinge, and pin by extruding the circles and lines created earlier.
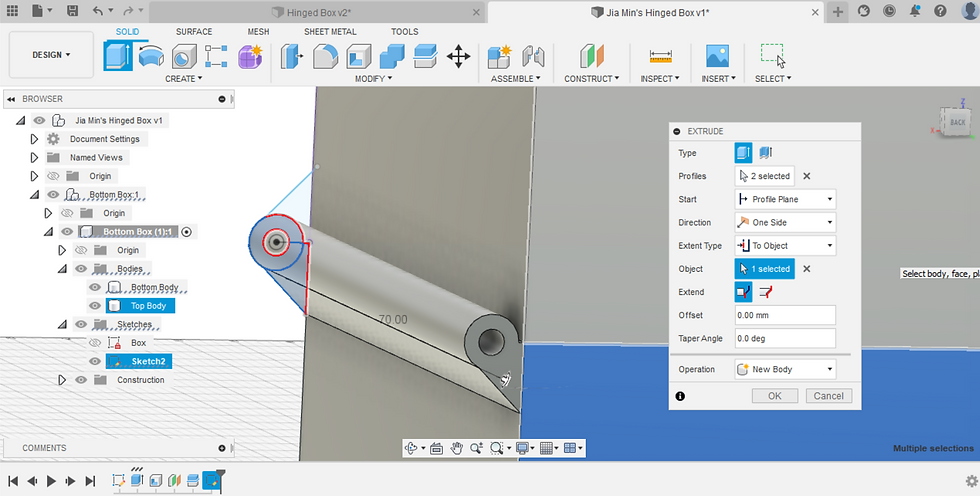

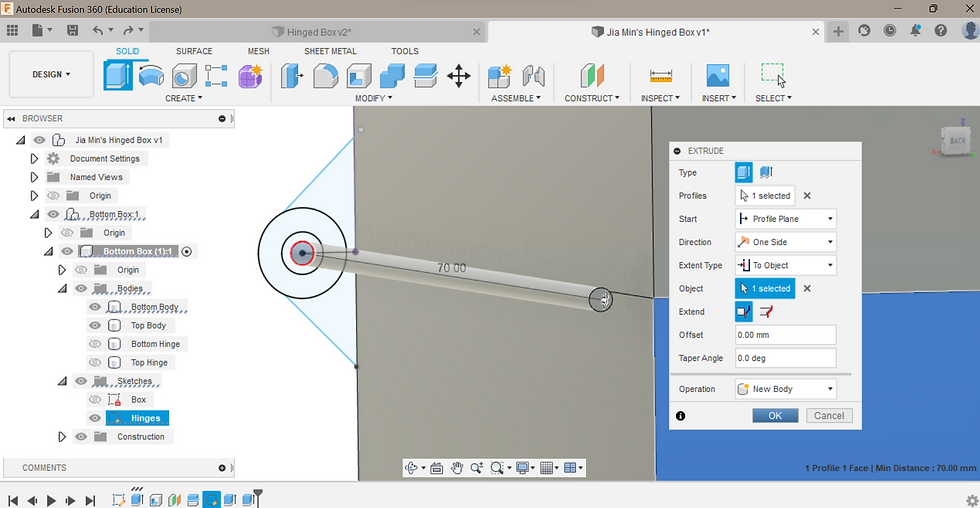
Step 12: Create sketch on the top surface of the bottom box

Step 13: Draw a rectangle of 5.5 mm x Wall Thickness from the center origin and another rectangle of 5.5 m x Gap next to it
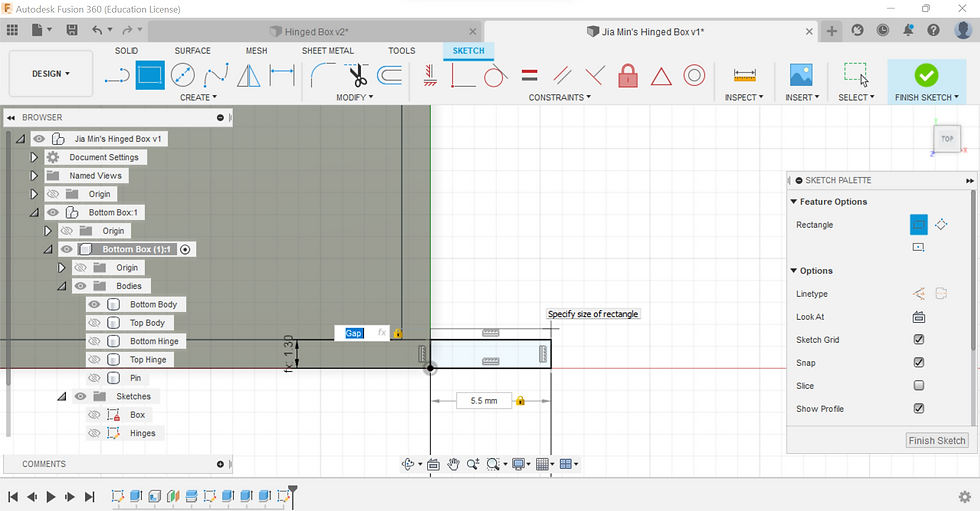

Step 14: Use the construction line as a mirror to create the same rectangles on the upper body of the box

Step 15: Extrude the 4 rectangles to form the hinges
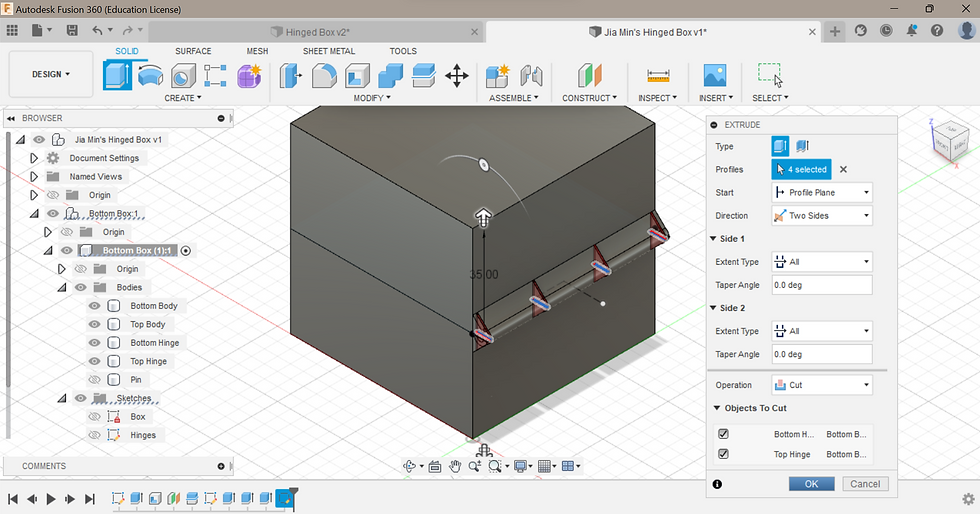
Step 16: Remove unnecessary parts so that the box can open and close freely.

Step 17: Use the as-built joints function to create joints so that the upper body does not fall off when opening the box.
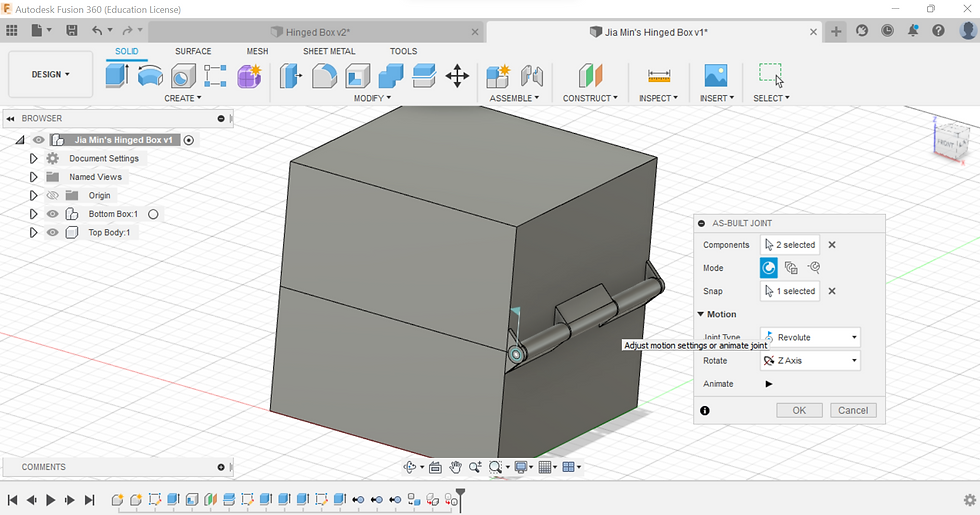
Step 18: To fasten the process of 3D printing, I reduced the size of my box to 10x70 mm and changed the parameters of Box Height to 20 mm.


Voilà! Here is the embed version of my hinged box 😌
Next, I have to save my file as STL format and use Cura to change the settings. I chose 10% infill density, 80 mm/s print speed, and I also added support for my hinged box. Then, I sliced it and the estimated printing time was 1hr 4mins.


Lastly, save the STL file to a USB drive and insert the micro SD card into the 3D printer. Press start and the printing begins!
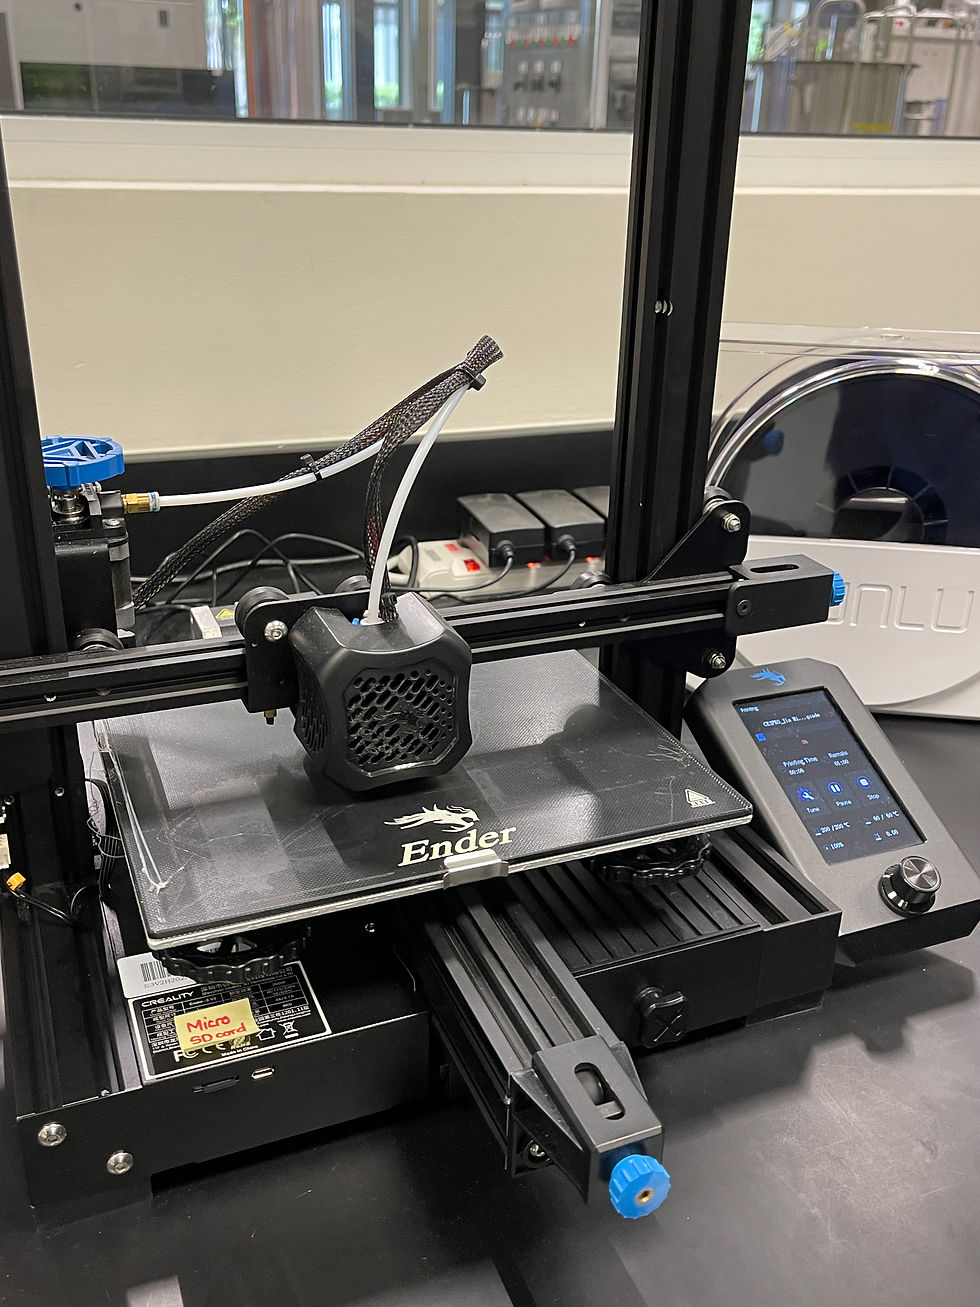

As the printing reaches 30 minutes mark, I soon realised that there was something wrong with the printing. The base of the box were not flat and had a slight dent on the bottom left side. The printing also looked super messy and there were loose materials everywhere. I immediately seek help from Dr Noel. He feedbacked that it was due to the dirty lens of the 3D printer. He also advised me to add in support to my hinged box and reprint it again using the other machine as this particular machine was not working well that day.


Finally after 3 trials, my final product!
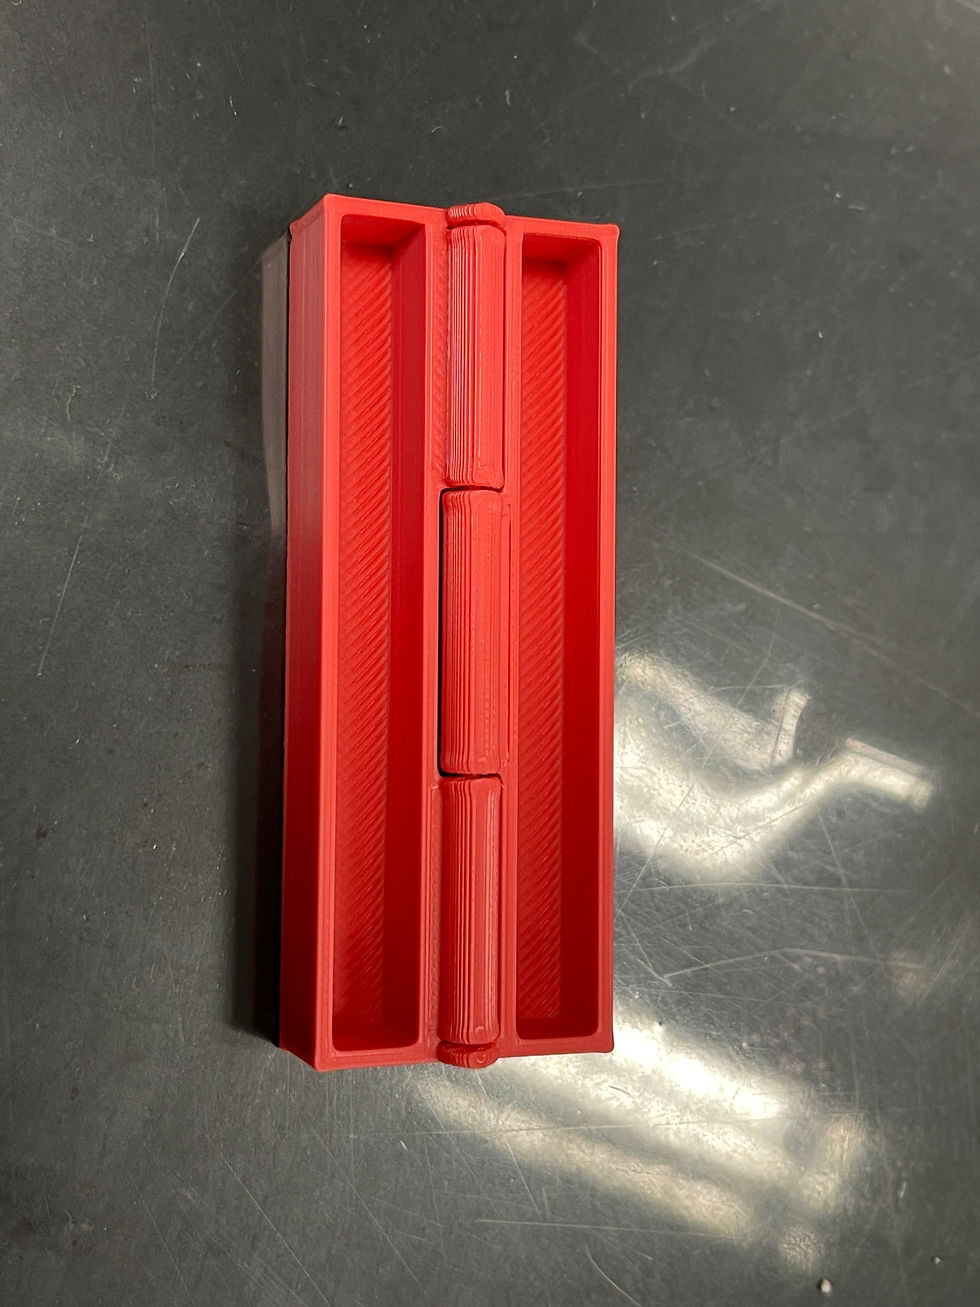

Reflection 😀
Through the whole 3D printing process, I had a lot of takeaways. Firstly, 3D printing is extremely useful and the possibilities of 3D printing will continue to grow and expand. It was a great experience learning 3D printing and I am very glad to have learnt it as I believe it would be very beneficial for me in the future. All of the knowledge and skills learnt can be applied during my FYP as my group design and create our own UV Light Handphone Sterilizer Box.
In addition, based on the mistakes I made during the 3D printing session, I am able to know where it went wrong and would not make the same mistake again. Before using the 3D printer, I would ensure that the lens is clean so that the printing can occur smoothly and it would not have so much errors and I do not to reprint so many times, reducing the waste of materials.
Last but not least, my hero shot and what I am using my hinged box for. 😂


Thanks for reading my blog! Wishing you a Happy New Year! 🌈
Comments